When logging into Circulation, the landing page is the Returns screen. To access Returns at any time select Item > Returns from the navigation menu.
Returns items from any borrower
There are a number of ways to return items.
Scan or enter the item's barcode or accession number in the Returns barcode box.
You can click the Search button to the right of Barcode box. You can use this to search for an item. It also allows you to return items that do not have an accession number.
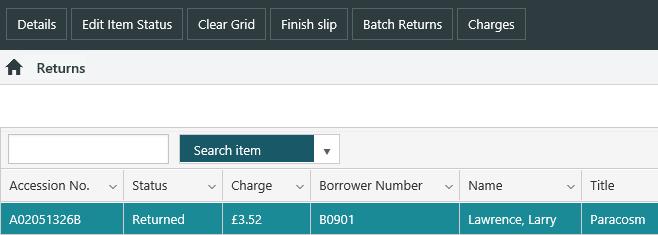
You can click Clear Grid to clear returns information from the screen.
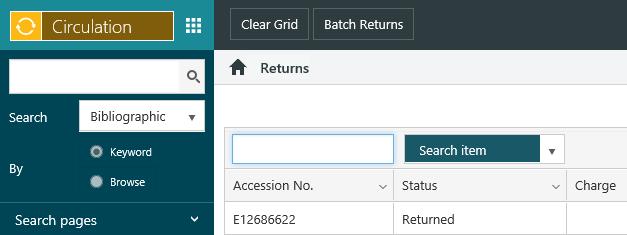
After you issue an item, you can select the item in the grid to enable a Return button in the Action Menu. You can click this button to return the selected item. You can also right-click the item and then click Return.
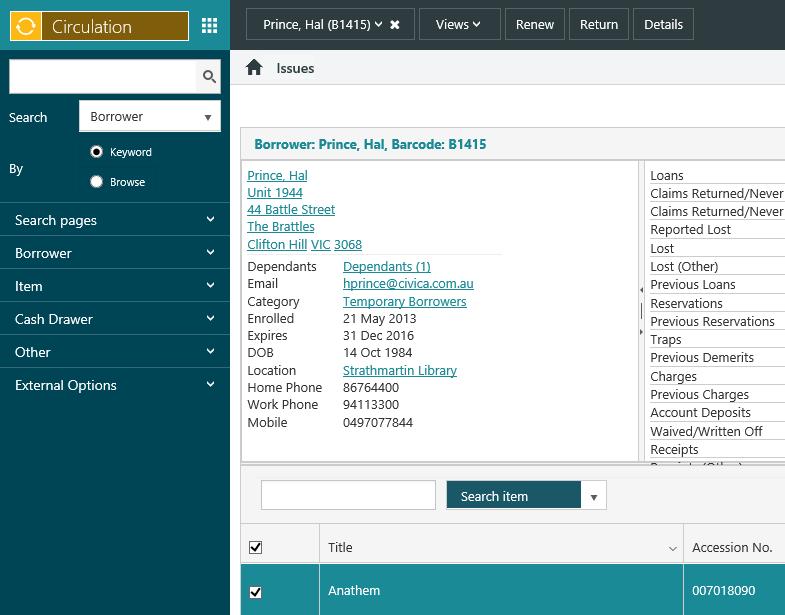
Returns items from a specific borrower
To return an item or items from a specific borrower:
- Select the borrower.
- Click Views in the action bar and choose Loans, or click the Loans hyperlink in the transaction pane.
- Select Return All.
Specify the return method
To specify the return method:
- Select Other and then Local Settings.
- Select the Return method from the dropdown list.
Waive fines when returning items
Fines can be automatically waived when items are returned through Circulation.
To do this:
- Go to Returns screen
- Select Other and then Local Settings.
- Select the Waive fines check box. When this is selected, you also have the option to select the Display fines checkbox.
- If Display fines is selected, you will be given the option to waive each fine.
- If Display fines is not selected, each fine will be automatically waived.
- Click Save to save your changes. You will now see the message “Override settings are active” at the bottom of the screen. You can click ‘x’ at any time to clear the settings.
- Return the item or items.
Pay charges when returning items
If the item you are returning has a charge then you can choose to pay, edit, waive or refund that charge. You can also choose to check the Cancel lost book charges and Refund lost book charges boxes depending on your library policies.
- Return the item.
- Click Proceed at the alert.
- Click the row or rows to select the charge or charges you wish to pay.
- Select Pay or Waive from the Action Menu.
Specify a grace period when returning items
A grace period can be set for a borrower when returning overdue items.
To do this:
- Go to Returns screen
- Select Other and then Local Settings.
- Specify a Grace Period in days for overdue day loans, or in minutes for overdue minute loans. If you have a high enough privilege level you can select Indefinite to specify an indefinite period of grace for overdue day loans.
- Click Save to save your changes. You will now see the message “Override settings are active” at the bottom of the screen. You can click ‘x’ at any time to clear the settings.
- Return the item or items.
If alerts are displayed
If alerts display when returning an item, you can only continue by doing one of the following.
- Pressing the Escape key.
- Clicking the OK button.
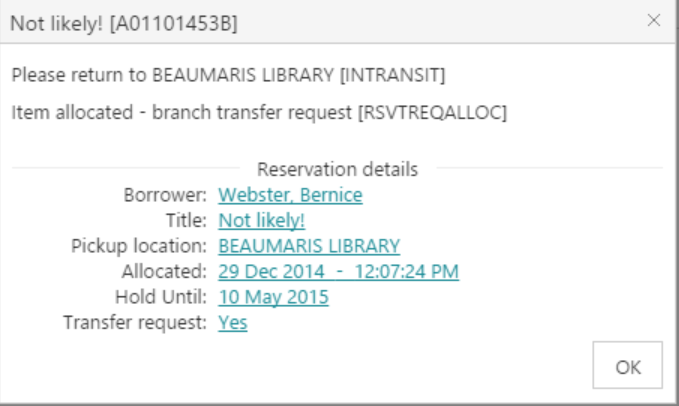
If you see an exclamation mark in the Status column
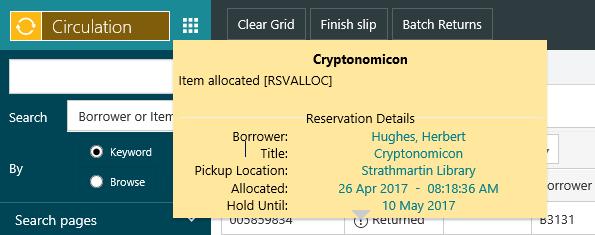
If you see an exclamation mark in the Status column it means there is something to note about the item. You can hover the cursor over the mark to see the note. In the example below the item we've returned has been allocated to another borrower and so the note shows brief details of the reservation. You can click any of the links in the note, for example, you can click the Hold until date to see the full display of the reservation.
Pay charges at return
If you select a row in the Returns grid, you'll see a Charge button in the Action Menu. You can also right-click on a row and then click Charges. This lets you pay or waive the charges for the selected item (e.g. overdue or lost charges) or add a deposit.
Return items in batch
You'll see a Batch Returns button on the Action Menu in returns. Click this button and you'll be prompted for the .txt files to process.
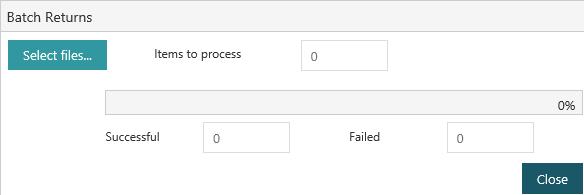
You can select multiple files. Each file should contain a list of item barcodes separated by a carriage return. You can pause, resume and cancel the batch returns process. The returns are non-interactive, i.e. there are no alerts.
Any local settings, e.g. the stocktake flag or an overriding date/time, are applied to each return.
The processed items are added to the Returns grid. At the top of the grid is an Export button. You can click this button to export the contents of the grid to an Excel file, for example:

Some things to keep in mind for batch returns.
- We recommend that you clear the grid before you start a batch return.
- If you're returning 5,000 items or less — All the returns are processed and shown in the grid, both successful and failed.
- If you're returning more than 5,000 items and none fail — All the returns are processed, but nothing is shown in the grid. You'll see the number of returns in the Successful box on the Batch Returns dialog.
- If you're returning more than 5,000 items and the number of failed returns is less than 5,000 — All the returns are processed, but only those that fail are shown in the grid.
- If there are more than 5,000 failed returns — All the returns are processed, but nothing is shown in the grid. You'll see a message saying that there are too many failed returns to show in the grid.